How Permanent Access Works?
 What is permanent access? It's when you can access a device at any time and use it continuously. Hence the name.
Adding a Device
To set up such access, you need to perform the following steps:
- Register your account
- Install the agent program on the device
- Bind the agent program to your account
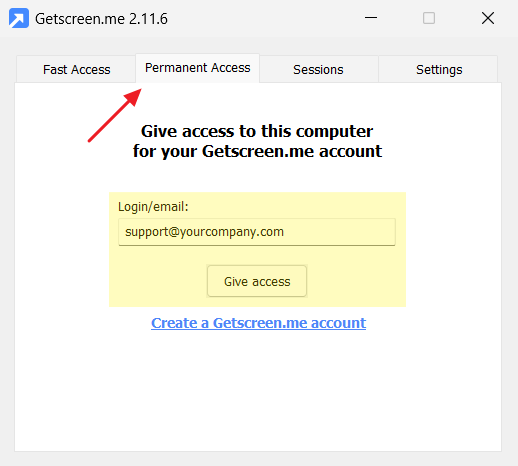
This process is called "Adding a Device," and after completion, a connection link appears in your personal account under the "Permanent Access" section.
Download the Agent Program
This is the most common and straightforward method. You need to download and install the required version of the agent program on the device you want to manage. Choose the version depending on the device's operating system. Currently, systems such as Windows, macOS, Linux, and Android are supported.
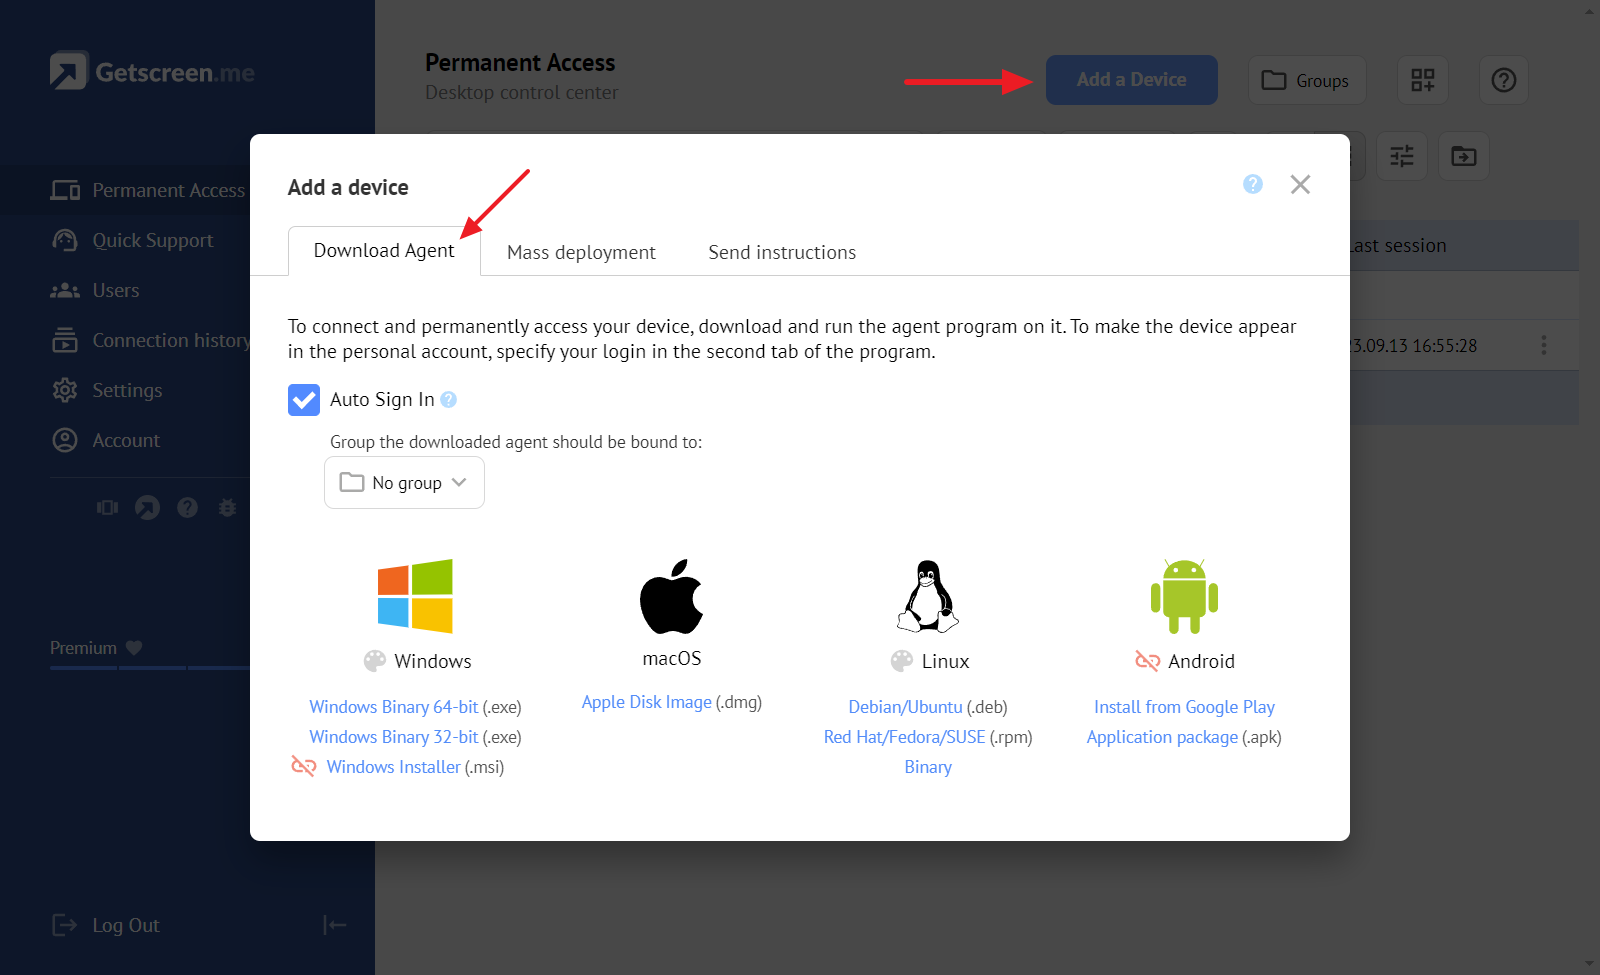
Automatic Binding
To avoid manually binding the installed program to your account, you can choose the "Automatic Binding" option, and the downloaded agent program will already be linked to your account. Confirmation of binding will be required upon the first launch. Not all versions support automatic binding.
Groups
You can also assign the device to the desired group in your personal account right away. Learn more about what groups are and why they are necessary on the page How To Add Remote Devices From Permanent Access Into Groups.
Branded Version
With branding settings, you can give the agent program a personalized corporate style. Learn more on the page Why Is Branding So Important?.
Mass Deployment
If you have a large fleet of devices, you can set up automatic deployment. You can do this using specialized RMM (Remote Network Monitoring and Management) or MDM (Mobile Device Management) systems. For Windows family operating systems, you can use Group Policy; see the detailed instructions Mass Agent Installation via GPO.
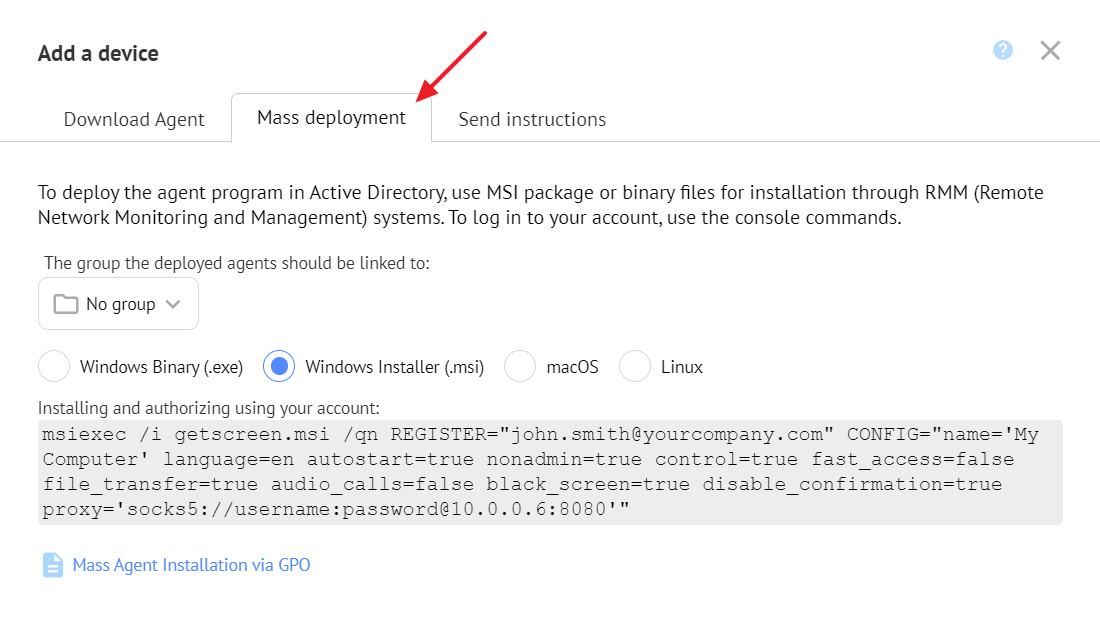
For different operating systems, console commands are available for working with distributions:
| Action | Command |
|---|---|
| Installation and authorization | getscreen.exe -install -register [email protected] |
| Preset settings | getscreen.exe -config "name='My Computer' language=en autostart=true nonadmin=true control=true fast_access=false file_transfer=true audio_calls=false black_screen=true disable_confirmation=true proxy='socks5://username:[email protected]:8080'" |
| Installation | getscreen.exe -install |
| Authorization with an account | getscreen.exe -register [email protected] |
| Uninstallation | getscreen.exe -uninstall |
| Launch service | getscreen.exe -start |
| Stop service | getscreen.exe -stop |
| Action | Command |
|---|---|
| Installing and authorizing using your account | msiexec /i getscreen.msi /qn REGISTER="[email protected]" CONFIG="name='My Computer' language=en autostart=true nonadmin=true control=true fast_access=false file_transfer=true audio_calls=false black_screen=true disable_confirmation=true proxy='socks5://username:[email protected]:8080'" |
| Action | Command |
|---|---|
| Installing daemon | Getscreen -install |
| Authorization with your account | Getscreen -register [email protected] |
| Preset settings | Getscreen -config "name='My Computer' control=true fast_access=false file_transfer=true disable_confirmation=true proxy='socks5://username:[email protected]:8080'" |
| Uninstalling daemon | Getscreen -uninstall |
| Action | Command |
|---|---|
| Installation | getscreen -install |
| Authorization with an account | getscreen -register [email protected] |
| Preset settings | getscreen -config "name='My Computer' control=true fast_access=false file_transfer=true disable_confirmation=true proxy='socks5://username:[email protected]:8080'" |
| Uninstallation | getscreen -uninstall |
| Version | getscreen -version |
Send Instructions
If the remote device is managed by a physical operator, you can send them a standard step-by-step guide on setting up permanent access. It looks like this:
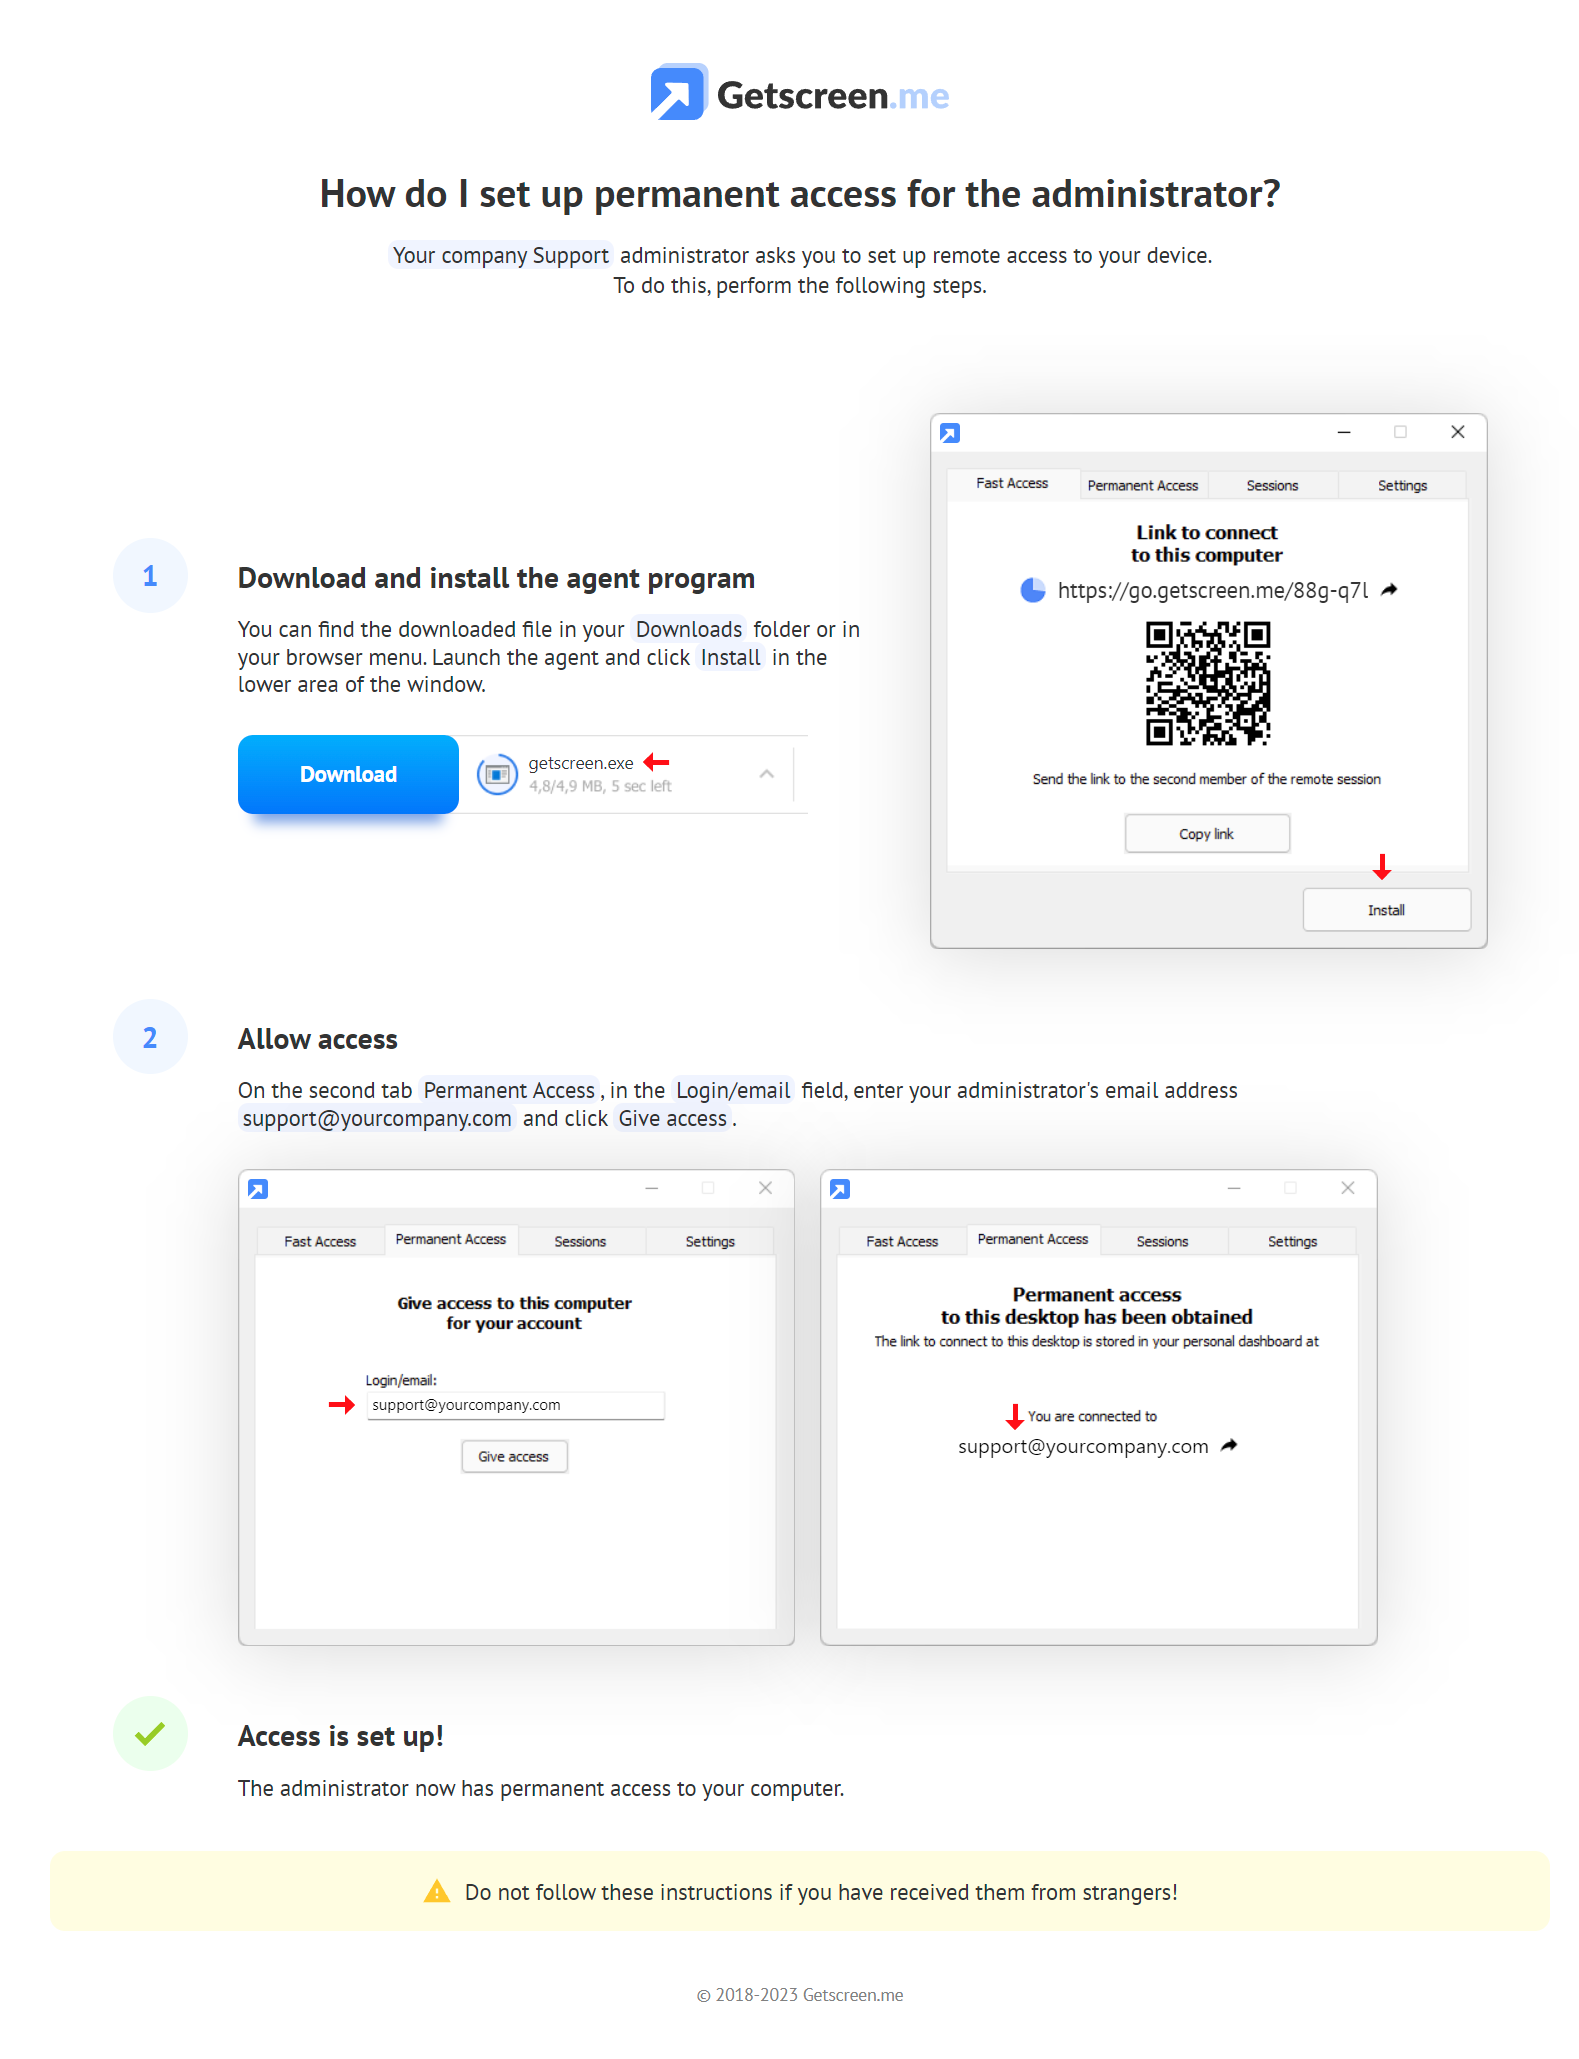
The instruction is universal and automatically adapts to the device's environment. You can also set predefined parameters. Learn more in the article Instructions for setting up permanent access for your customers.
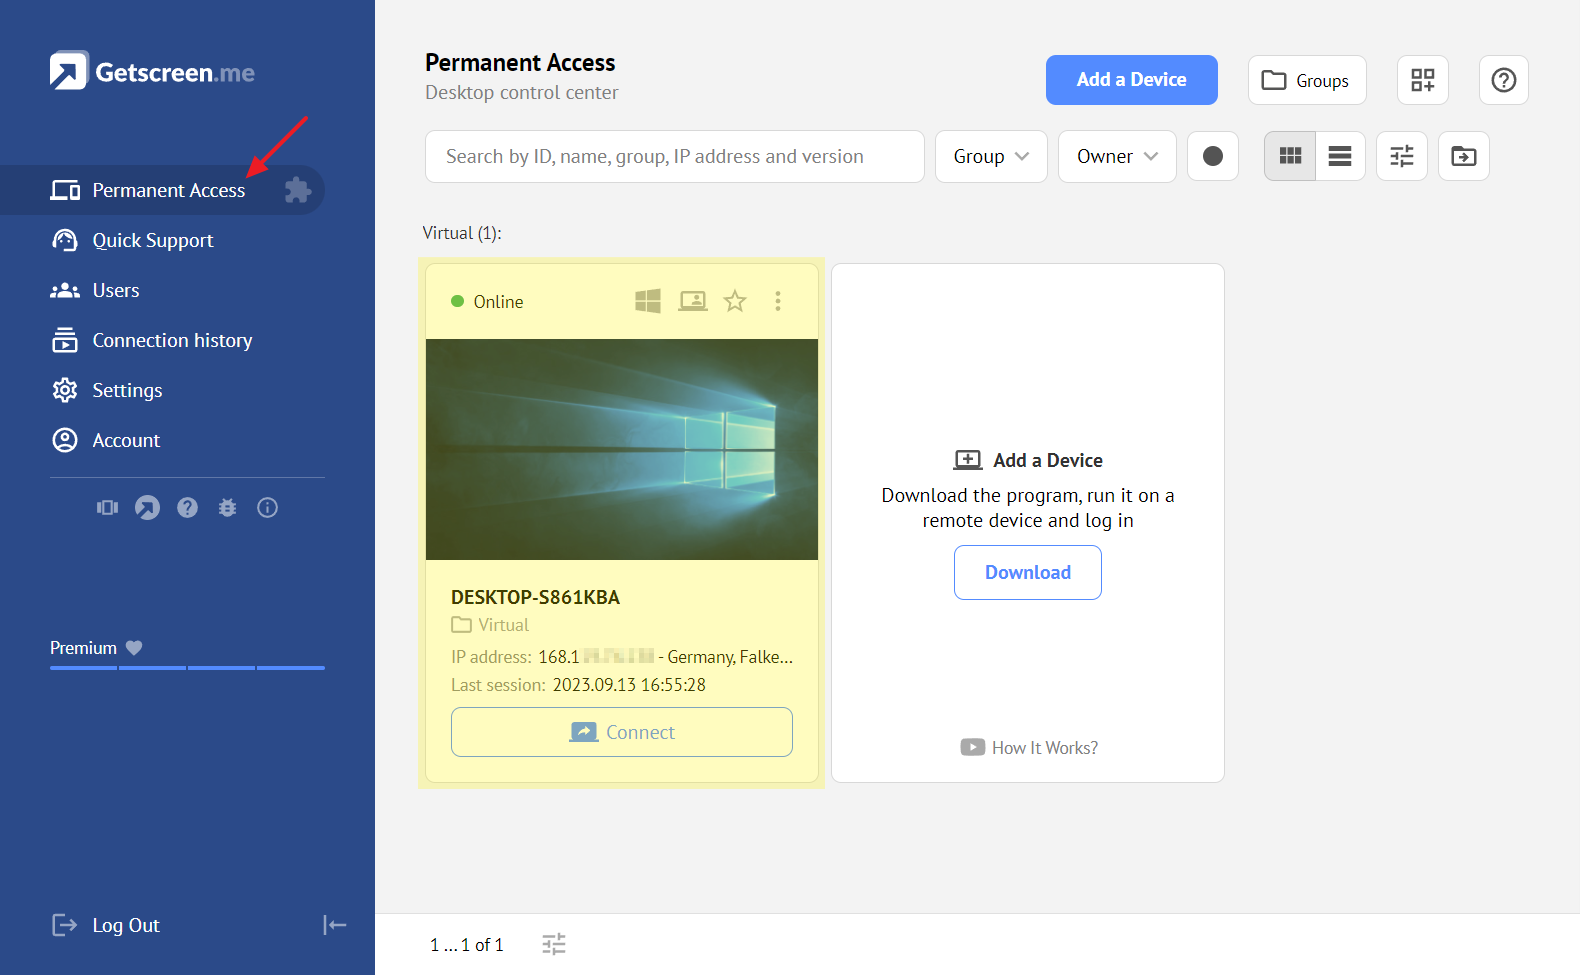
Device List
After adding a device, it appears in the list. You can filter devices by various parameters, search for individual devices, and display the list in table form:

Groups
When working with a large number of devices, you can organize them into groups. Using groups, you can grant access to devices to other users and apply various settings for the agent program. Learn more about groups in a separate guide How To Add Remote Devices From Permanent Access Into Groups.
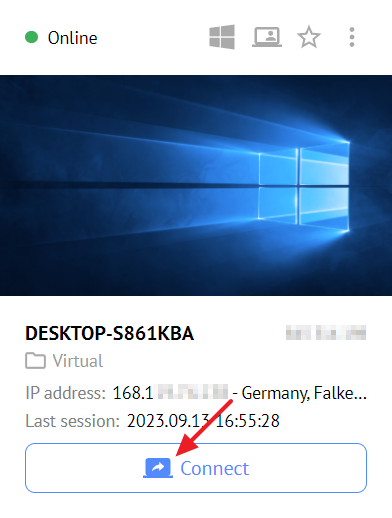
How to Connect to a Device
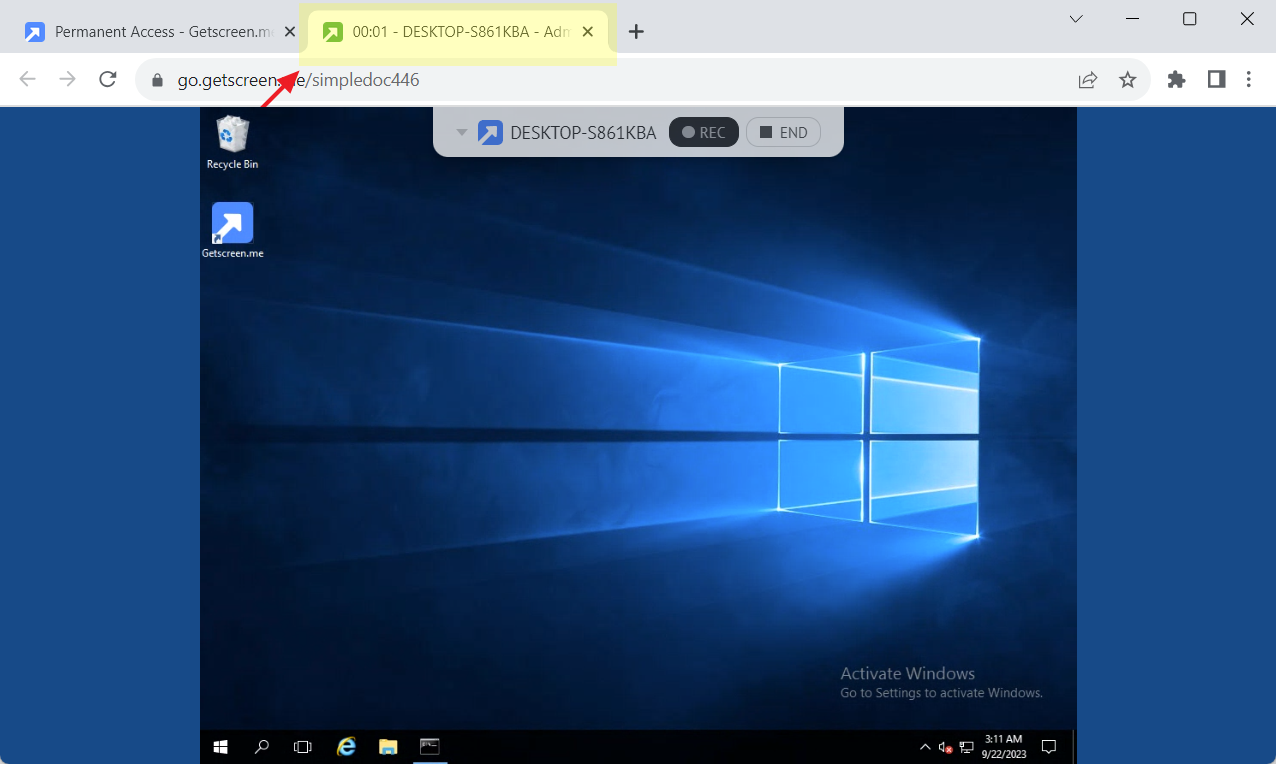
To connect to devices, you need to go to the Permanent Access section and click the connection button either directly from the list or from the device card:
A new tab will open, and the connection will be established automatically:
What Else Can You Do with Devices?
In addition to managing the desktop in permanent access, other important functions are available for remote devices.
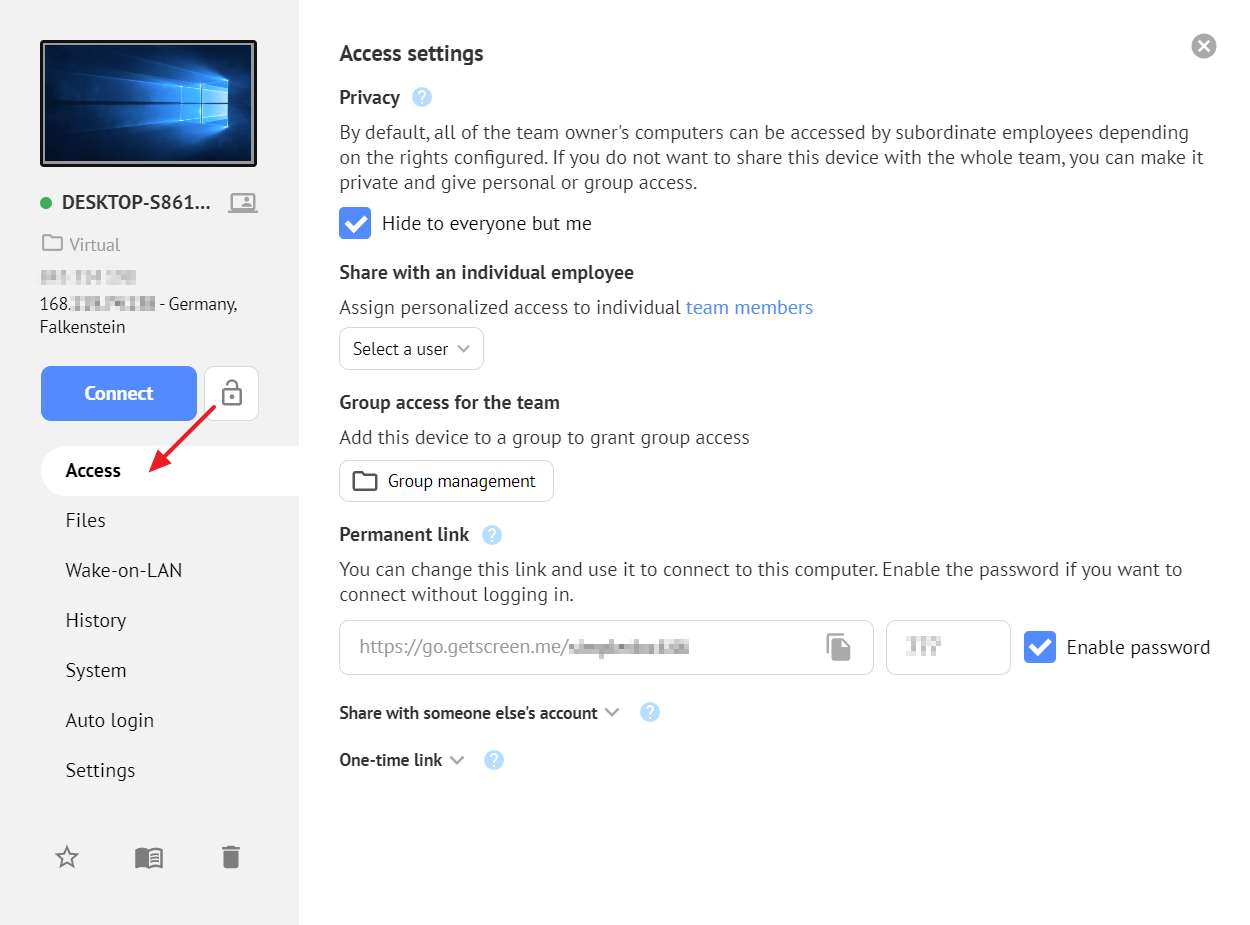
Share
You can share access to the device with another account in your team. For example, for multiple operators to work simultaneously on one device. Learn more in the article Users and the Device Access Rights System.
Upload Files
You can navigate through the device's file system and download necessary files without explicit device connection.
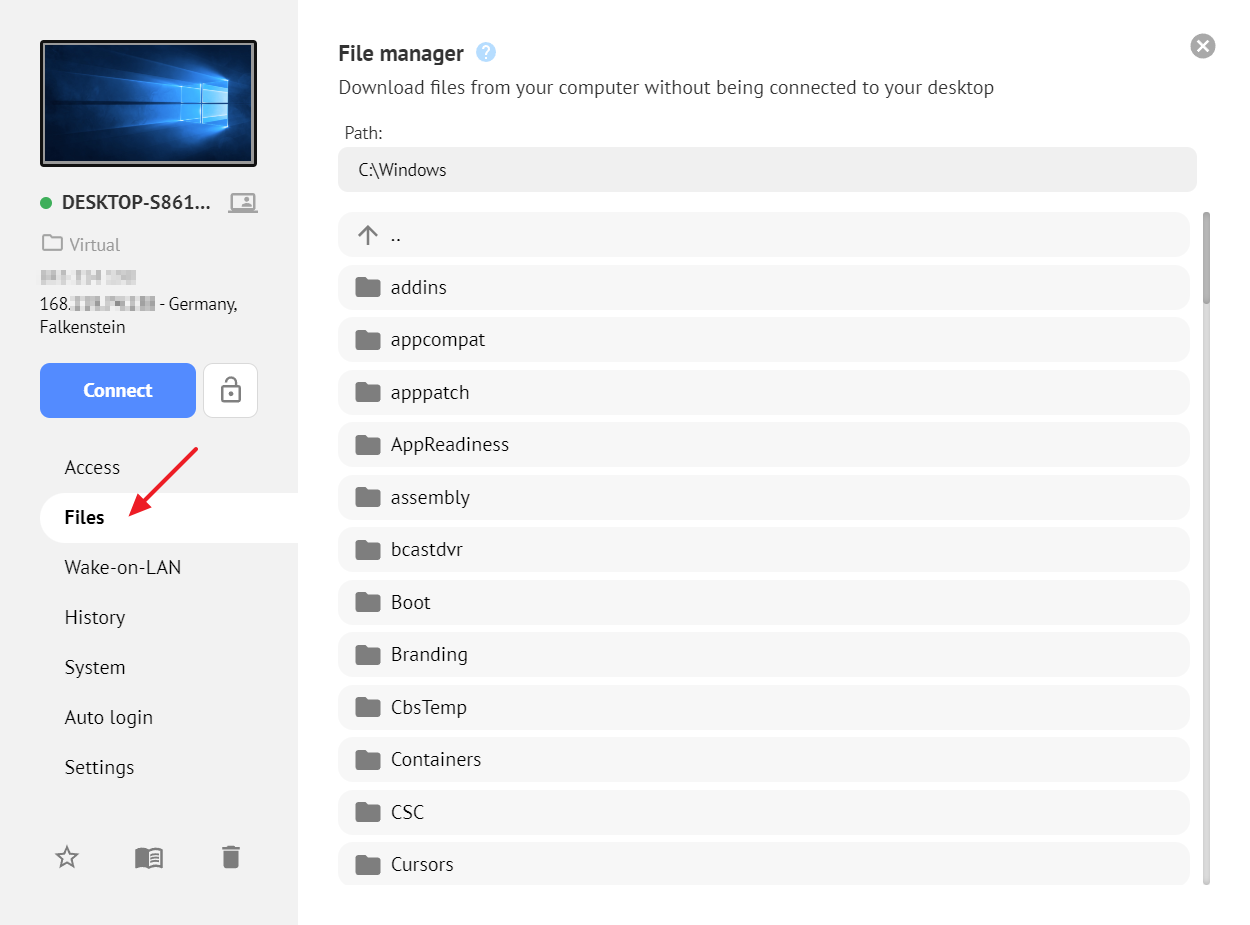
This feature can be disabled through agent settings or group settings.
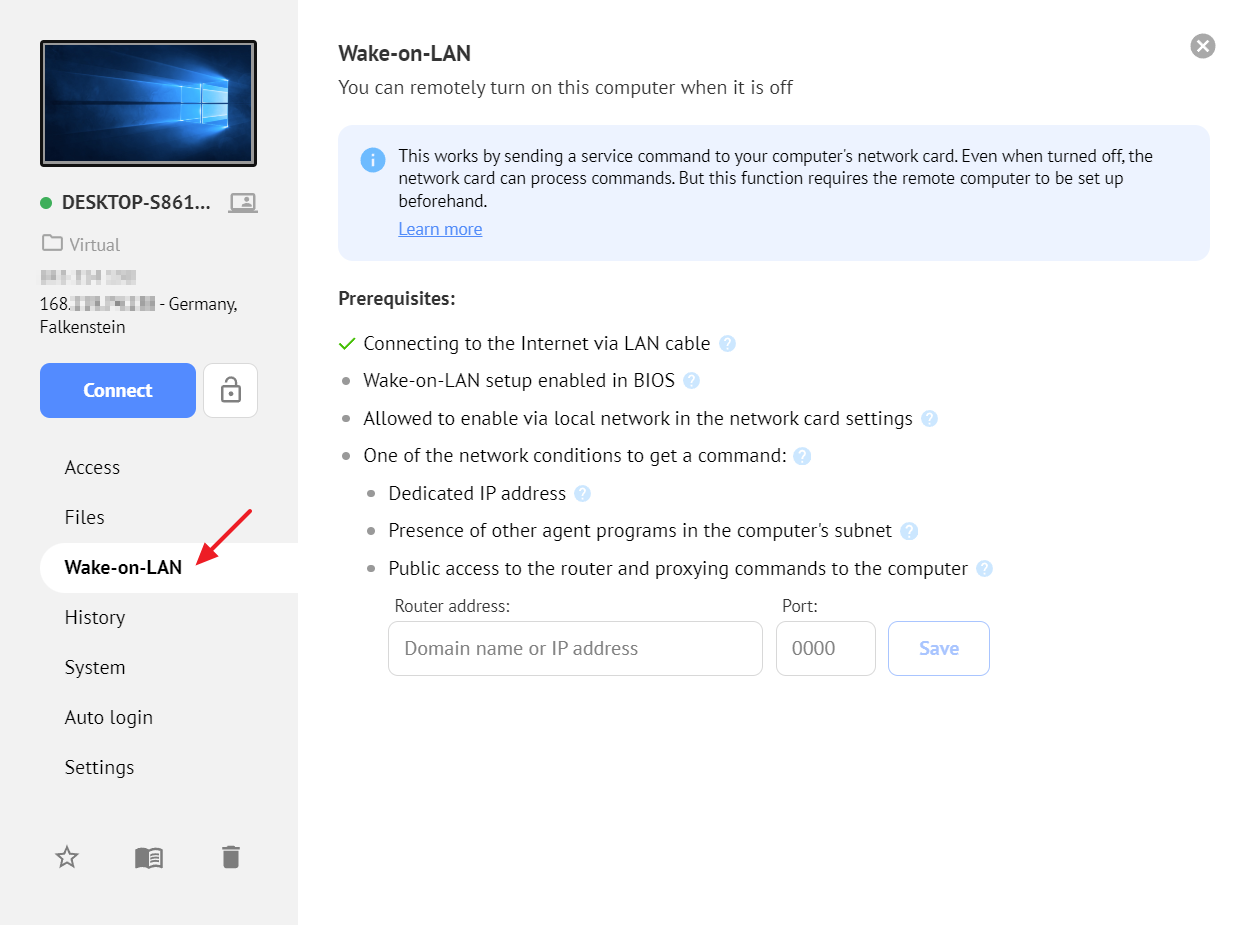
Wake Up
You can turn on a remote computer using the Wake-On-LAN technology if you have configured the device in advance. Learn more in the article How to configure Wake-on-LAN?.
Others
Furthermore, when a device is in permanent access, you can:
- View connection history
- View device action logs
- View system information
- Configure automatic login to the system account
- Add comments and notes about the device